• “Happy Anniversary” White Chocolate Raspberry Cake

    I made this cake for my friend Jill’s parent’s 40th Wedding Anniversary. The cake is a tender white cake flavored with almond and vanilla, paired with homemade raspberry filling and white chocolate buttercream frosting. I love the combination of white chocolate and raspberry. Raspberries are in season right now so I always love to use what’s in season. I like to buy fresh raspberries when they are on sale, then I wash and dry them and  lay them out on a sheet pan in the freezer; after they have frozen solid, then I repack them up for another trip to the freezer in ziplock freezer bags.  Even if you buy frozen fruit remember; buy when that fruit is at the peak of season, and you know you are getting the best quality.  For the recipe below I have made it easy for everyone and you can buy a 12 oz. bag of frozen raspberries.

    The cake recipe is from King Arthur Flour company www.kingarthurflour.com  and I was dying to try out the recipe as they have a new cake flour blend and the recipe is actually on the back of the box. Thier flours are very high quality and this new cake flour blend  is my new favorite of cake flours; it’s a bit pricey, but it is worth the extra money.  It is made without any chemicals and unbleached, and I seriously think it’s one of the best white cake recipes I’ve had; it’s very moist and tender just like the name implies. And believe me, I’ve tried quite a few of white cake recipes in my day.

    “Tender White Cake”  {recipe from King Arthur Flour}

    Yield: 2  layer cake with (8 or 9 inch rounds), one  9 x 13 pan, or 20-24 cupcakes.

    Note: If you are making a party cake like I did; I double the recipe (so I can fill and have a 2 layer cake) and make 2 of the 9 x 13. A 9 x 13 will feed 15-21 people nicely.

    Ingredients:

    2 3/4  C  King Arthur Unbleached Cake Flour Blend

    1 2/3  C  Sugar; superfine is best – {See my tip below}*

    1 Tablespoon baking powder

    3/4 tsp.  salt

    3/4 C unsalted butter; softened to room temp

    4 large egg whites plus 1 whole egg

    1 C full-fat vanilla yogurt OR 1 C whole milk {I used whole milk and it came out divine}

    2 tsp. vanilla extract

    1 tsp. almond extract

    * Suzie tip: Don’t buy superfine sugar in the store; they jack up the price and all you need to do is put good old regular white sugar in your food processor and whiz it for a few seconds with the metal blade to turn it into superfine. I buy sugar in huge quantities;  [shocking, I know] to save money :-)  and what I do is have 2 separate containers for my sugar; one labeled “superfine” and when I have a chance I just whiz some  in the food processor and pour it into my container.

    Directions:

    Preheat the oven to 350 ° F

    Mix all of the dry ingredients for 2 minutes on slow speed, to blend and aerate the flour. This is actually part of the back of the box instructions but telling you; [DO NOT SKIP THIS STEP!] this is my own personal two cents here. This helps ensure a loftier cake. Add the soft butter and mix into a paste; (my two cents again;  it will actually look more like wet sand). Add the egg whites, then the whole egg, beating after each addition to begin building the structure of the cake. Scrap down the sides and bottom of the bowl periodically.

    In a small bowl, whisk the yogurt (or milk), with the vanilla and almond extracts. Add that mixture, 1/3 at a time, to the egg mixture. Bet 1-2 minutes after each addition, until fluffy, scraping the sides and bottom of the bowl. Pour batter into greased and floured or parchment-lined pans (two 8″ or 9″ round, one 9″ x 13″, or 20 to 24 cupcakes).

    Bake the cake(s) in a preheated 350º F oven for 25-30 minutes or (see below) time tips from King Arthur.

    For 8-9 inch pans ~ 25-30  minutes

    For 9 x 13 inch pan ~ 23-26 minutes

    For cupcakes ~ 20 minutes.

    The cake I did was a 9 x 13 and mine took 29 minutes; so there ya go; but everyone’s oven is different.

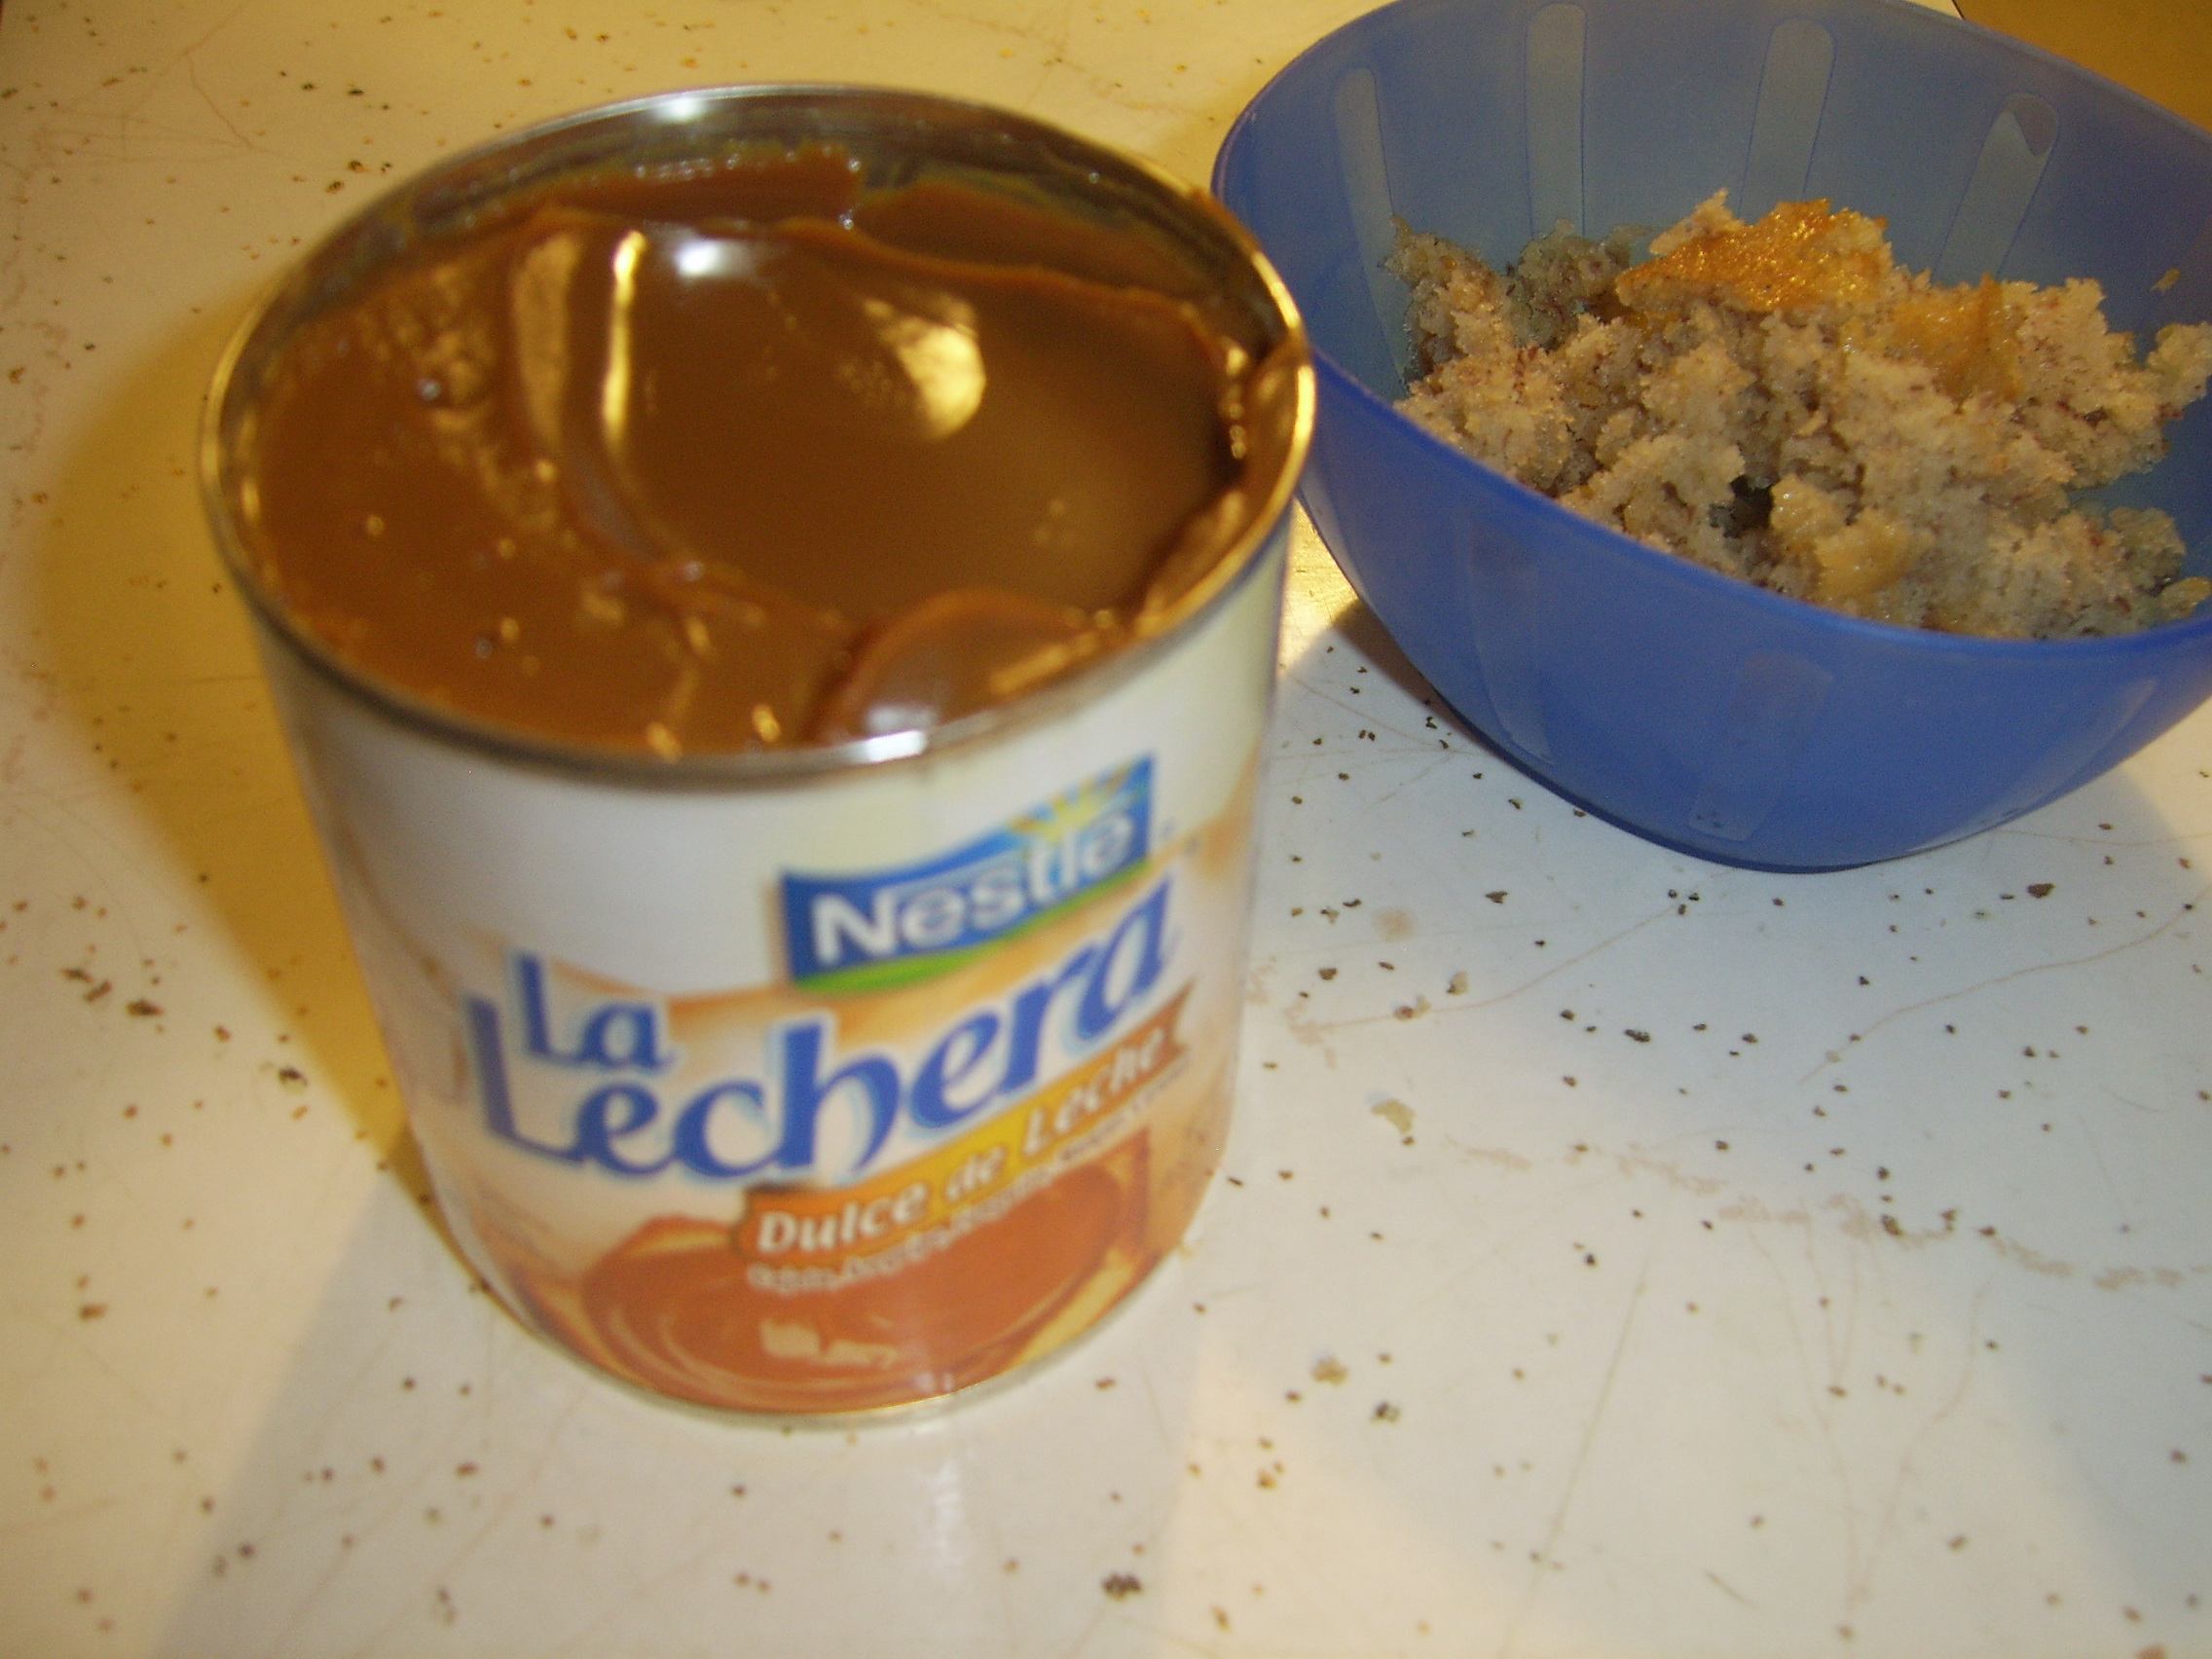
    Raspberry Filling: This recipe is a bit time-consuming; but it’s worth the effort. {Note; this is not only a filling but great on scones, blended into ice cream for a milk shake, spread on pancakes, Hell→ straight out of the bowl} :-)  I’m just sayin’…

    I will sometimes double or triple this recipe because it  freezes very nicely; so it saves you time when the urge strikes you to make a cake!

    1 bag of frozen unsweetened raspberries (12 oz.) {thawed for 30 minutes}

    1/4  C water

    1/3 C Sugar

    1/4 C  orange juice

    3/4 tsp. cinnamon

    3 Tablespoons cornstarch mixed with 2 Tablespoons cold water to make a “slurry”

    Directions:

    In  a 3 quart pot; place the entire bag of raspberries; including any juice that has collected in the bag;  heat the raspberries, water, sugar, orange juice and cinnamon until mixture has boiled and berries  have broken down to where they do not look whole anymore. Strain the mixture through a fine mesh strainer over a bowl and push  and press the mixture with a spatula several times through the strainer to encourage the puree to collect on  the underside of the strainer ; and  with the spatula scrape the puree that  clings to the underside and let fall/collect in the bowl. Keep doing this until you can no longer collect any puree from the underside of the strainer and it looks like all you have left are raspberry seeds. Discard seeds. Pour your collected mass of puree/juices back into the pot and add your slurry of cornstarch and water. Bring the mixture back to a boil; whisking constantly until the mixture thickens. Pour into a bowl and refrigerate until mixture is cool. Before I place the mixture in the fridge…

    * Suzie tip: I like to taste the mixture and see if it is sweet enough; If it’s not quite sweet enough for your taste; at this point I add a Tablespoon of light corn syrup or more if you need to adjust the sweetness and mix with a spoon. Let the mixture cool completely before attempting to fill the cake.

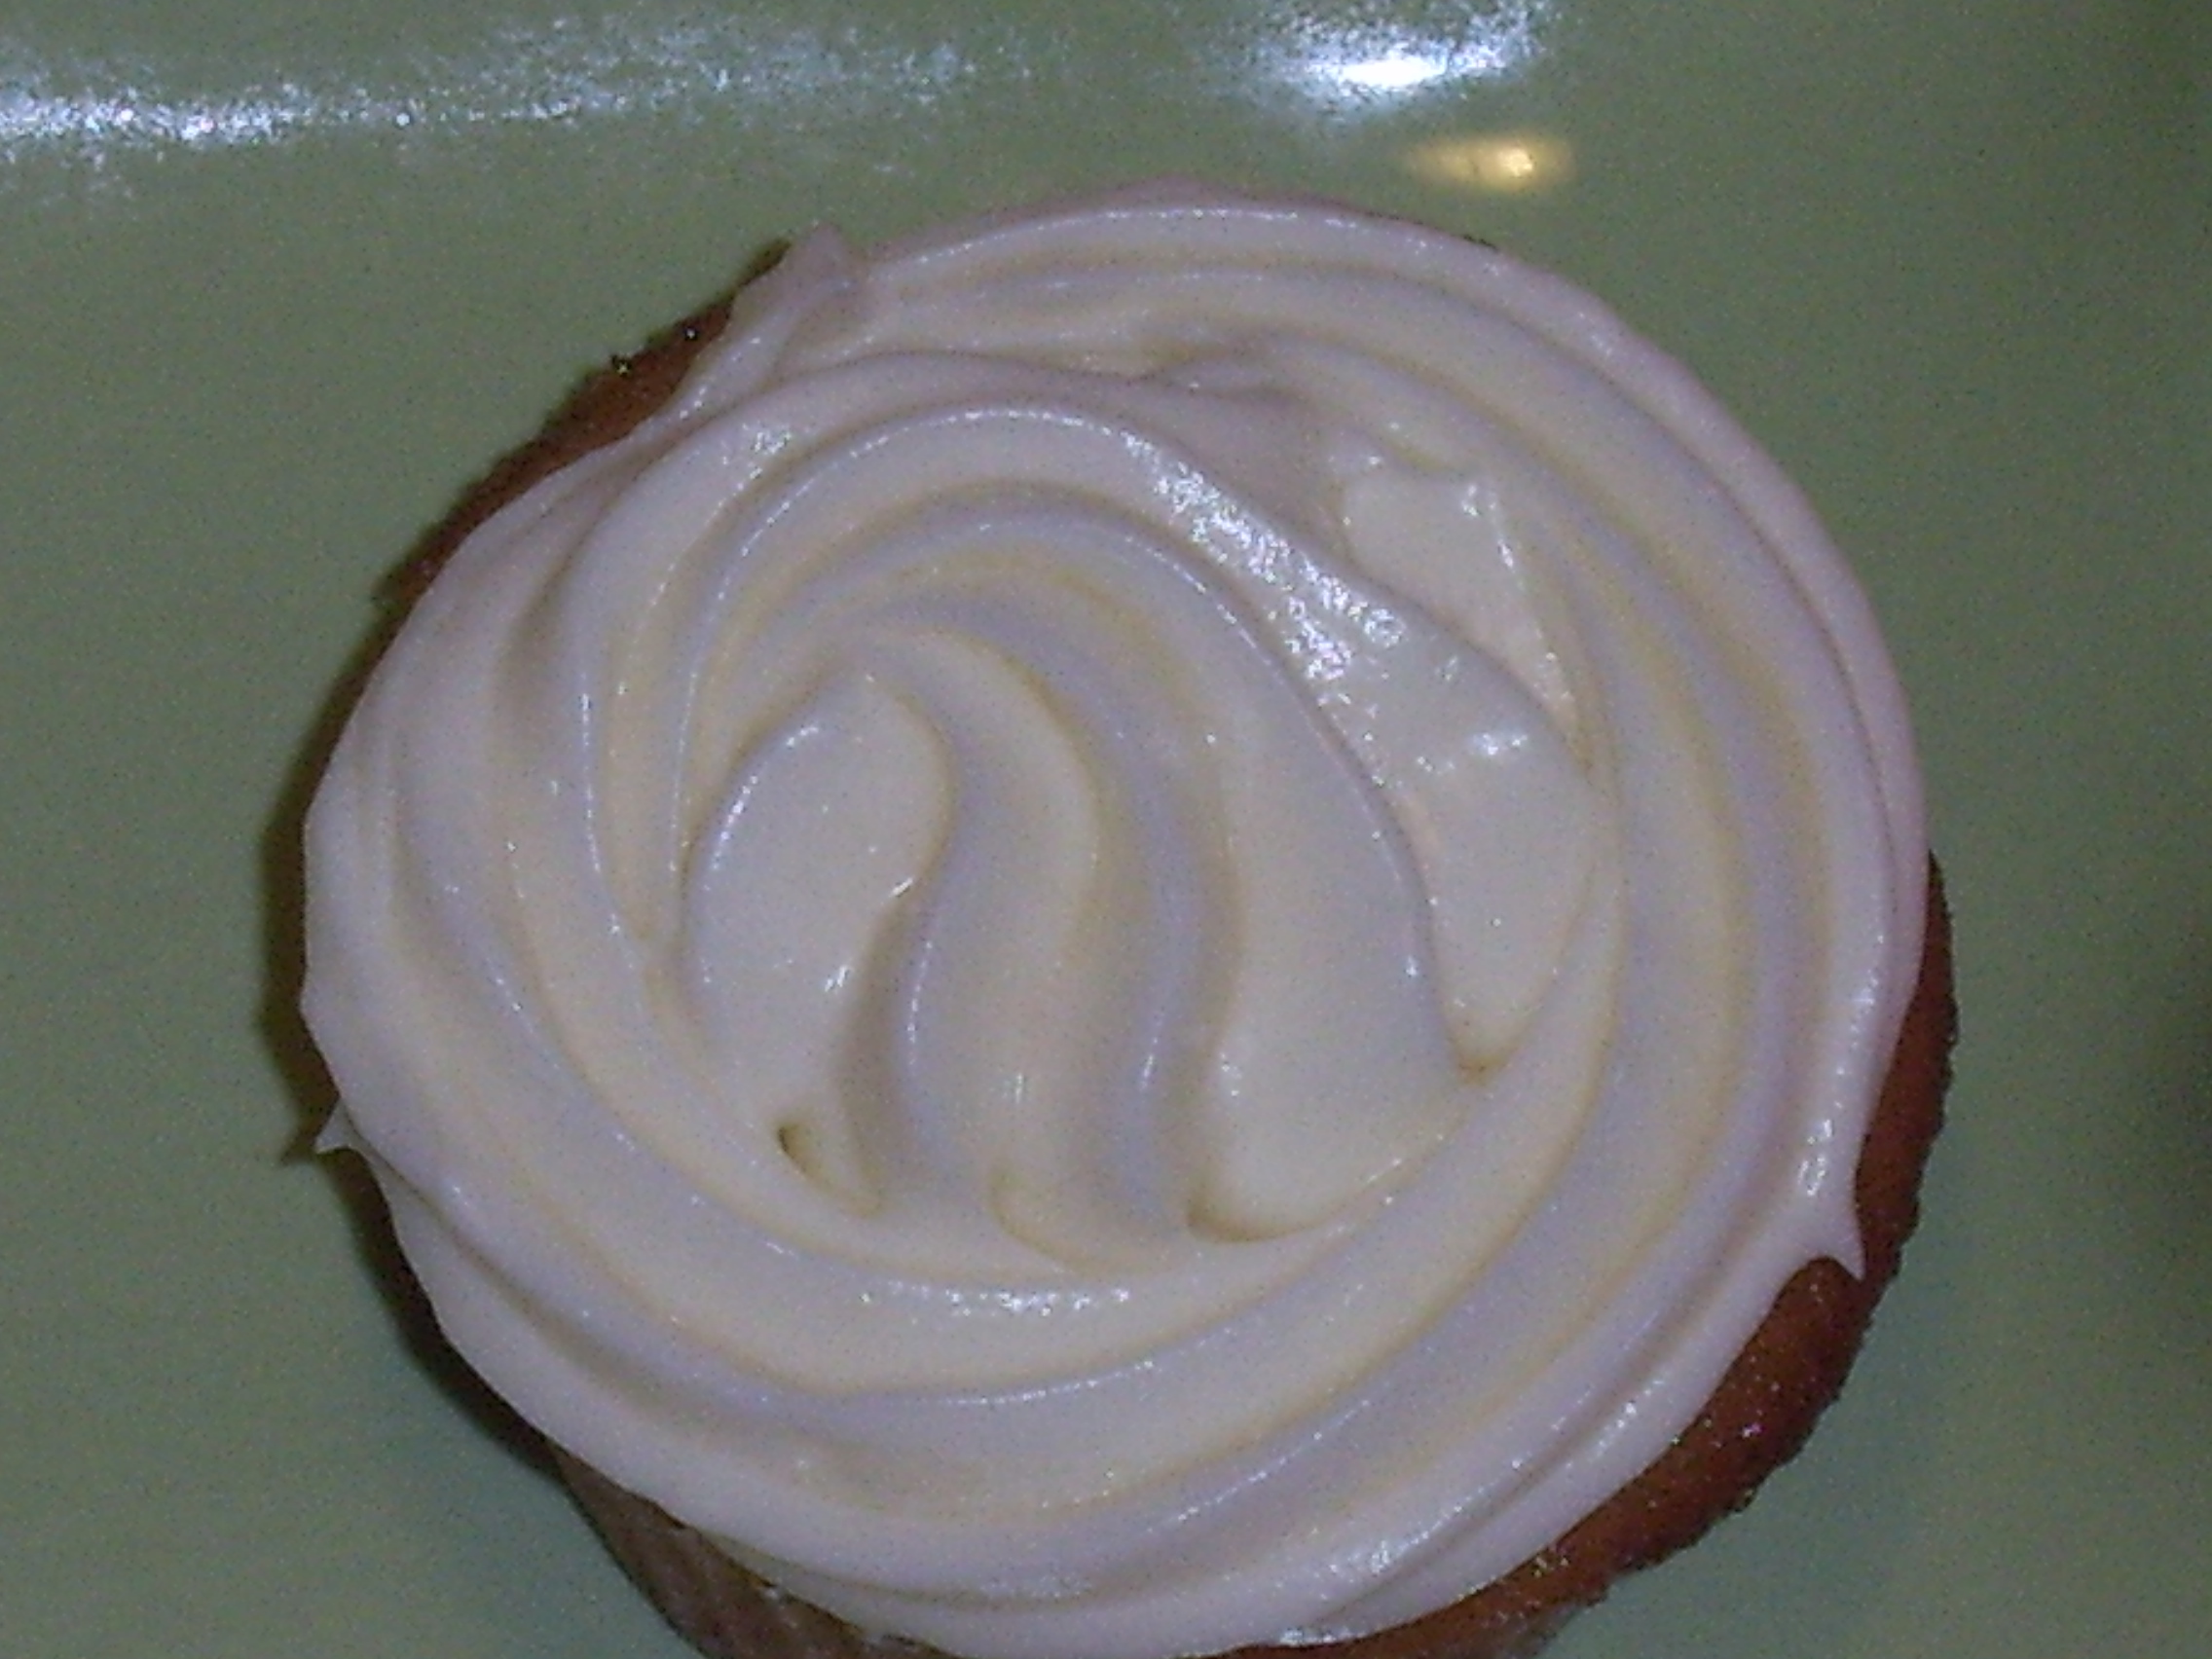
    White Chocolate Buttercream

    Ingredients:

    2 sticks unsalted butter

    3 C  confectioners sugar

    pinch of salt

    4 oz. white chocolate (melted & cooled)

    1 tsp. vanilla extract

    4 Tablespoons  half and half

    Directions:

    In a medium bowl; sift the sugar and add in the pinch of salt to mix. In the bowl of a stand mixer with the paddle attachment;  beat the butter and confectioners sugar until very fluffy; start slow so the sugar does not go flying. Stop the mixer to scrape down the sides and bottom of the bowl as you go. Add in the vanilla and mix. Add in the chocolate that has been cooled; make sure it is totally cooled before adding. Beat the mixture on high for about 3 minutes.

    Madeira simple syrup:

    In a small saucepan boil 1/2 C water and 1/2 C water until the sugar dissolves. Add in one Tablespoon of Madeira. If you don’t have Madeira; don’t sweat it. Matter of fact you can skip this step all together. It’s a cheffy thing; we like to brush our cakes with simple syrup.
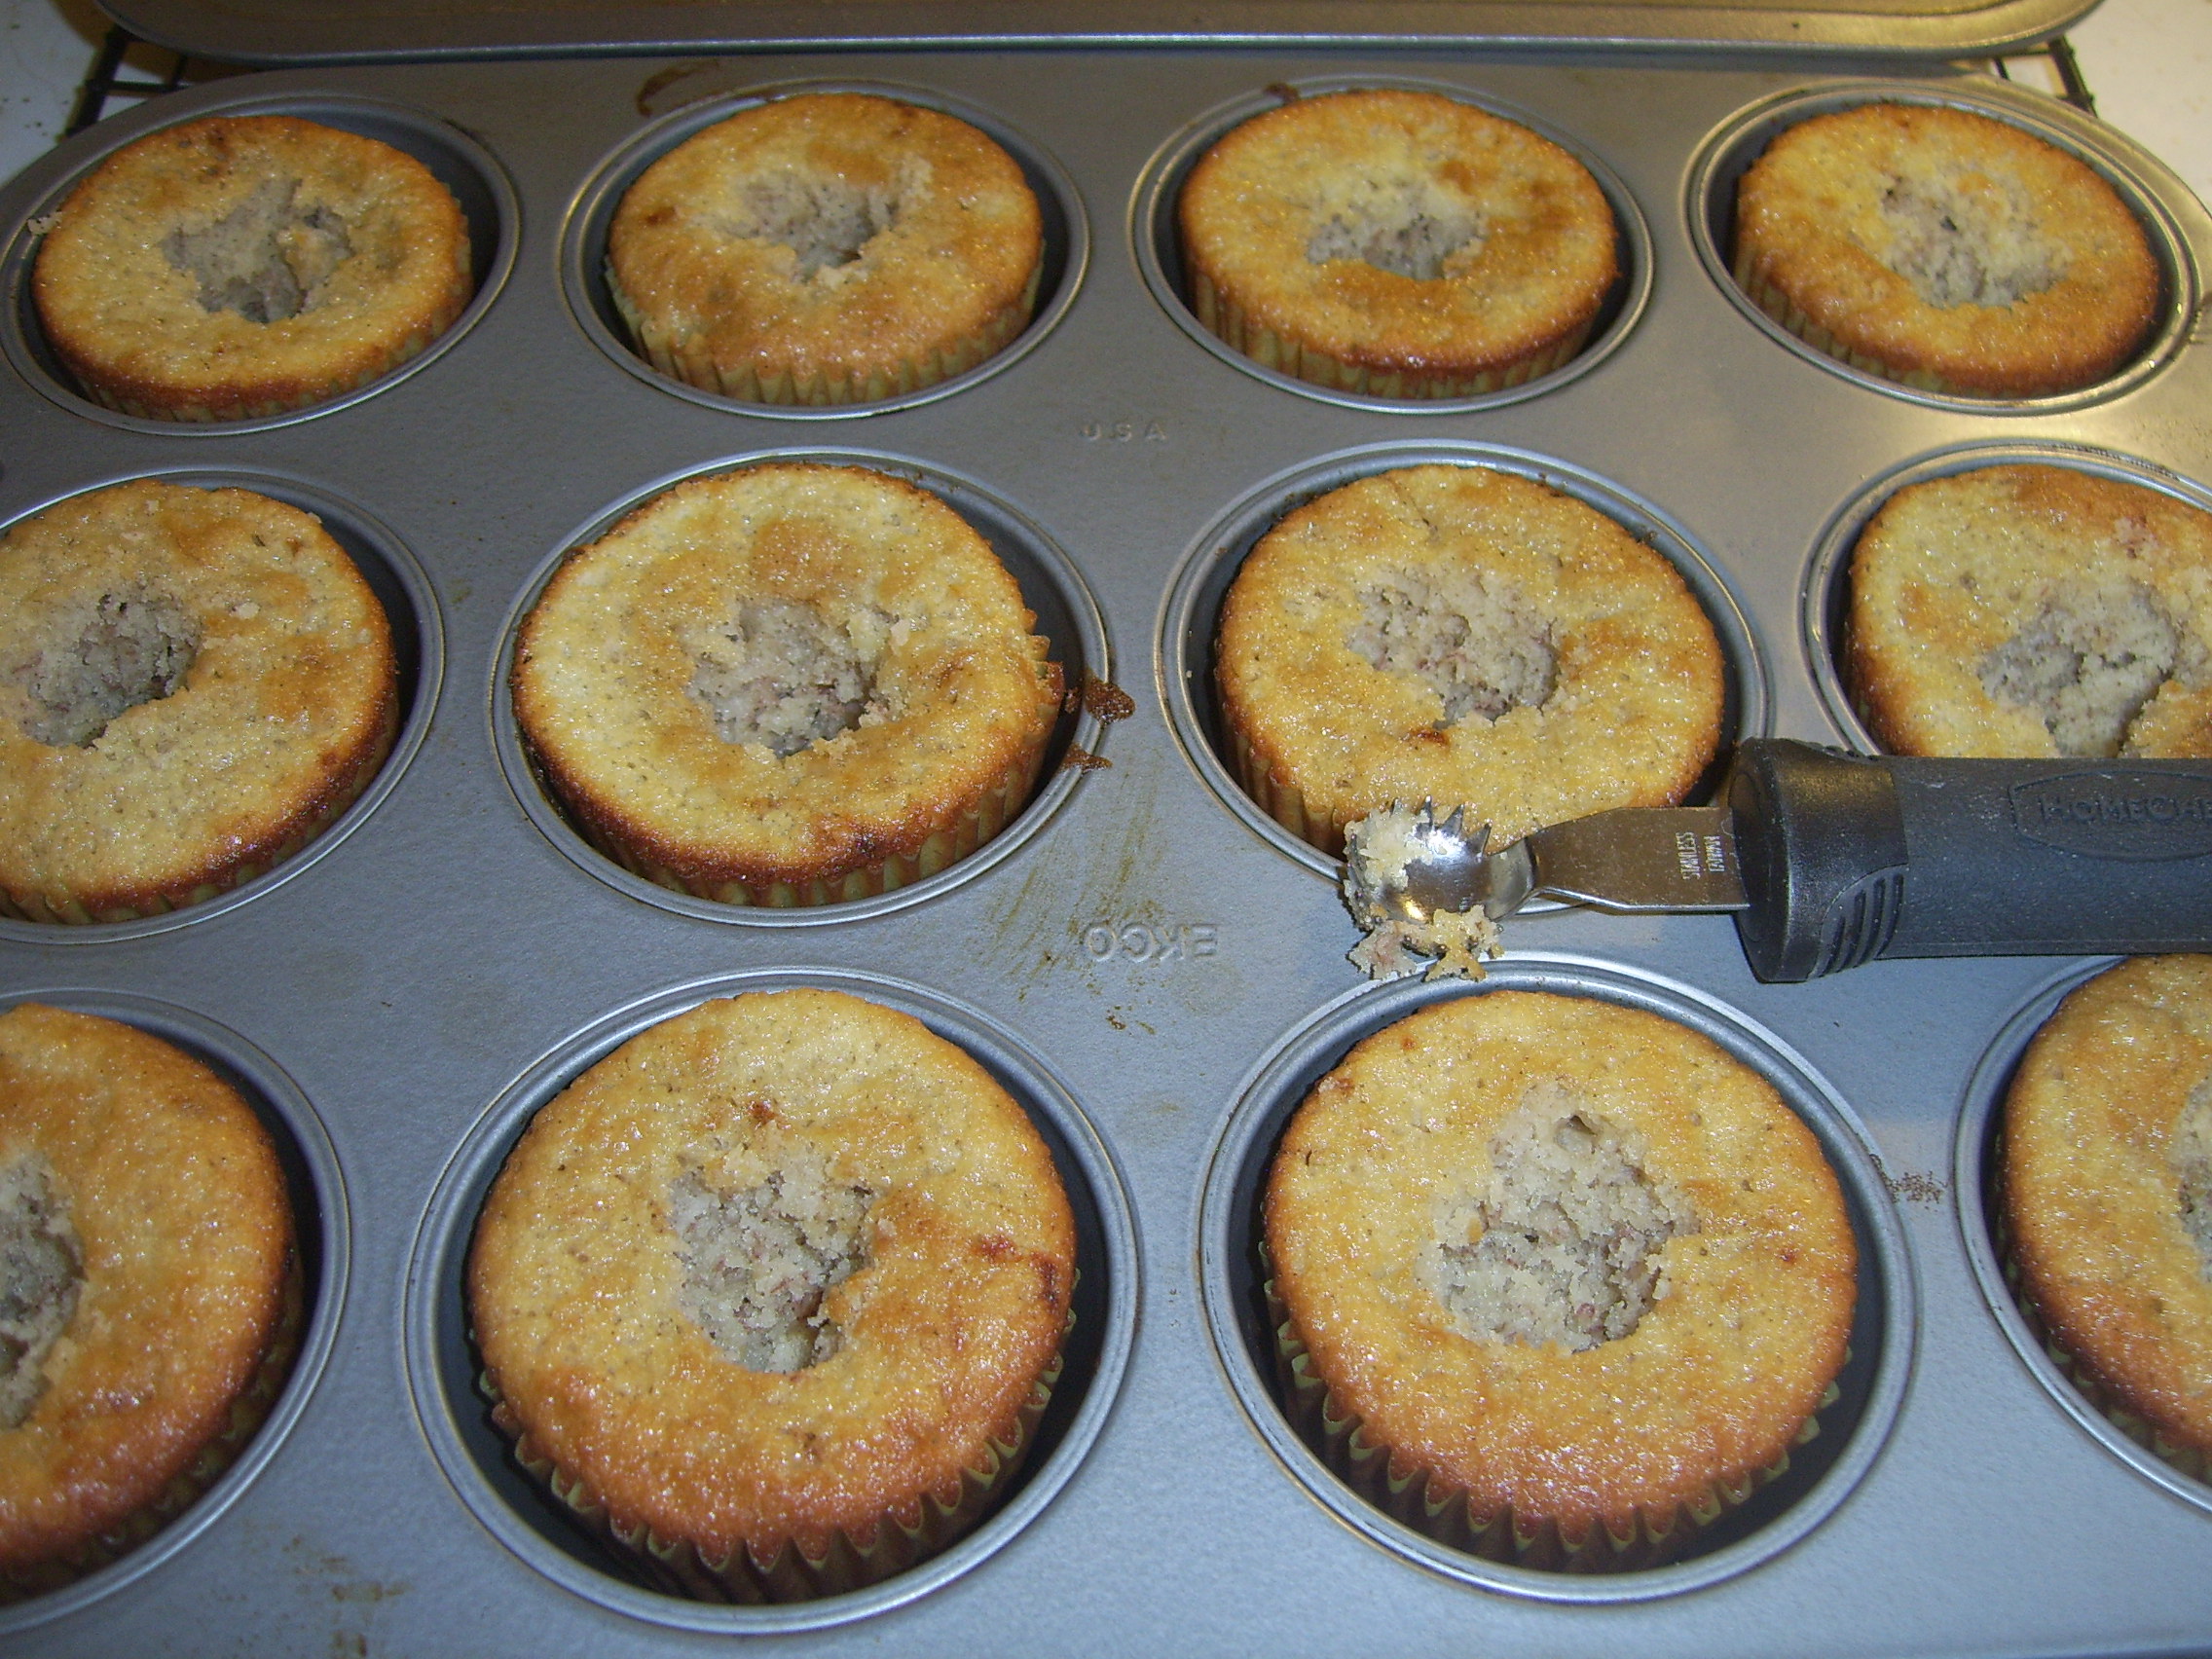
    Cake assembly:

    Let the cakes cool completely. I shave off a very thin layer of the tops of the cakes to create a nice flat surface. Brush each layer with the Madeira syrup.

    Pipe a ring of buttercream damn around the perimeter of one cake layer; this will ensure the filling does not seep out. I use a piping bag with a large round tip but if you don’t have one; simply use a large ziplock bag; fill your bag with the buttercream and cut a corner off of the bag so you can “pipe” your ring of buttercream damn. Fill in with the raspberry filling and level off the filling so that it is flat. Place the next cake layer on top and brush with syrup. Cover the top and sides with the buttercream.

    Enjoy

    Happy Baking!

    Suzie

  • THAT’S RIGHT, YOU HEARD ME RIGHT…

    Yes, I said Potato Chip Cookies.

    I think this is a Midwest thang.

    I was born and raised in Michigan and we Michiganders don’t throw anything away. 

    You just don’t throw away perfectly good potato chip crumbs! You put them to good use.  :-) 

    That’s right, by “good use”  I do mean adding butter, flour, and sugar!

    HAVE YOU NOT LEARNED ANYTHING ABOUT ME BY NOW ?!  :-)

    You must  fill up that lunch pail with something besides good old peanut butter and jelly!  I swear every kid growing up in the Midwest had a Mother who made these potato chip cookies. I was no exception. My Mom used to make these all the time. I took my Mom’s recipe and tweaked it a bit. Yeah, she does not mind, because she knows me.  She knows my “religion”.  Her recipe originally calls for margarine.  Margarine is against my….let’s just say…. “baking religion”. 

    Just can’t go there. Now, here ye Parkay and the like, I didn’t say there was anything wrongggg with MARGARINE…Like I said; it’s just against my “baking religion”. You can’t fault a person for their religion, right???  Okay, good. Just so we are clear on that.

    People out here in San Francisco  just look at me weird when I mention this cookie.

    People from the Midwest totally know what I am talking about and they thank me.

    Everyone I’ve met who is from the Midwest knows how good a potato chip cookie is.

    So let’s hear it for us Midwest folk! and don’t you dare throw away those crumbs!!! or let your “old man” tilt back &  shovel them into his mouth either. For the love of God!! we need to make cookies!! 

    Yes, that’s exactly what you tell him…

    Potato Chip Cookies

    Ingredients:

    1 C (softened) room temp butter 

    1 C  light brown sugar

    1 C  white sugar

    2 eggs (room temp)

    1 tsp. vanilla

    2 Cups all-purpose flour

    2 Cups crushed potato chips

    1 C  finely chopped nuts (walnuts or macadamia nuts are both good)

    Sugar for sprinkling

    Directions:

    Preheat the oven to 350 °

    Prepare a cookie sheet or 1/2 sheet pan with parchment paper or a silicone silpat baking mat.

    In a small bowl; whisk the flour, Set aside.

    In the  bowl of a stand mixer, fitted with the paddle attachment; beat on medium- high speed  the butter and sugars until light and fluffy; about 2-3 minutes.  If you don’t have a stand mixer,  you can use a hand mixer and use a large bowl.

    Add eggs one at a time, beat on medium speed;  stopping the mixer to scrape down the sides and bottom of the mixer bowl. Mix until combined. Add vanilla, combine. Add flour  and mix on medium low until combined. Take the bowl off the stand mixer and by hand using a wooden spoon, add the crushed potato chips and combine. Add nuts and combine.

    Take about a little less than a  tablespoon of dough and  make round  balls and place them 2  inches apart on the cookie sheet.  Sprinkle with granulated sugar. The cookies spread quite a bit when baking, so make sure to keep them 2-3 inches apart.

    Bake at 350 ° for about 11 minutes or until light golden brown and they are still soft.

    Set the cookie sheet on a wire rack and let the cookies cool completely on the cookie sheet before removing them.


    Happy Baking


    Suzie

  • Rich Chocolate Pudding

    When I was growing up, my Mother used to put me in charge of making the pudding. I’m not really sure how it happened, that I became the “Jello de Master”, but I loved doing it.   I remember feeling so grown up making that Jello brand pudding. It was a treat that we shared as a family. Many a Saturday or Sunday night we would all sit around and watch “Family TV” and eat warm pudding. Always warm, never cold.  Something about watching “The Undersea World of Jacques Cousteau” and giant squids paired perfectly while tucking into warm chocolate pudding.  :-)

    It seemed so magical watching  the transformation of this mysterious brown powder that came in such a tiny box.  Who knew that brown powder and milk would eventually yield into something so chocolatey, warm, and luscious. Times have changed, and I still like to make pudding from time to time but now I like it HOMEMADE. It doesn’t take much more effort to pull together items from the cupboard and fridge to create a really good pudding. I alway keep 60 % cacao baking bars in my cupboard for such an occasion as well as a number of things. This recipe is from a tried and true website online that you can find a multitude of sins from, be it chocolate pudding or apple pie. The website is www.epicurious.com

    Ingredients:

    1 C Sugar

    1/4 C cornstarch

    pinch of salt

    8 0z. Ghirardelli (60 % cacao) bittersweet chocolate, finely chopped

    2   2/3 C whole milk

    2 large egg yolks

    2 Tbsp. butter

    1 tsp. vanilla

    Directions:

    In a heavy saucepan; whisk together the sugar, cornstarch and pinch of salt. Stir in the chopped chocolate. Set aside with the burn off for now.

    In a medium bowl whisk together the milk and the egg yolks until smooth and combined.

    Place the saucepan with the chocolate mixture, and with the heat on medium, gradually whisk the milk/egg mixture into the chocolate mixture. Whisking constantly; heat the mixture over medium heat until the pudding comes to a boil. Still whisking; Let the pudding boil for one minute. Take off the heat and whisk in the butter and vanilla. Pour the pudding into four 8 oz. serving cups. Place plastic wrap directly on the surface to avoid a skin from forming. Let the pudding cool enough so it is still warm, but not hot enough to burn your tongue. Enjoy!


    Suzie

  •  

    MOTHERS CAN BE QUITE PREDICTABLE CAN’T THEY….

    It comes as no surprise to me that my Mother asked if I was going to make anything “healthy” for my blog.

    I knew this was coming. I just didn’t expect it so [gulp] soon.

    My Mother likes to eat pretty healthy. No scratch that.

    She eats very healthy.

    I swear I am her daughter.

    We do share the same DNA, yes.

    It’s not that I don’t understand these things. I am a Nurse after all. :-)

    I do try to incorporate more healthy choices in my diet.

    I SWEAR MOM, IT’S TRUE!!

    I know right now, my Mother is at home laughing hysterically as she reads this.

    I was thinking about my Mom and Dad especially when I formulated this healthy recipe.

    My Dad just recently recovered from heart surgery and is doing great  :-) so more than ever they are trying to make healthy choices a daily part of their lives.

    So Mom and Dad, this is for you. I know, who’d of thunk it?

    Blueberry Cherry Granola

    Ingredients:

    4 Cups Rolled oats (also known as old fashioned)

    3/4 C sliced almonds

    1/3 C sunflower seeds (roasted, unsalted or raw is fine too)

    1/3 C vegetable oil

    3/4 C honey

    1/4 C hot water

    1/4 C dark brown sugar

    1 tsp. cinnamon

    1 tsp. vanilla bean paste (or 1 tsp. vanilla is fine)

    1/2 tsp. salt

    1/2 C  dried tart cherries; chopped fine

    1/2 C dried blueberries


    Directions:

    Preheat the oven to 300 °

    Prepare a 1/2 sheet pan or rimmed cookie sheet with a piece of parchment paper or a silicone silpat if you have one.

    In a medium mixing bowl, combine the oats, nuts and seeds. Set aside.

    In a 4 Cup glass measuring cup, place the oil, honey, water, dk. brown sugar,cinnamon, vanilla, and salt. Microwave on high for one minute.

    Pour the hot mixture over the oat mixture and stir to combine thoroughly. Spread the granola out on a 1/2 sheet pan or a rimmed cookie sheet and bake at 300 ° for 30 minutes. Remove the granola from the oven and right on the same pan, stir in the dried berries.

    Bake for an additional 45 minutes. Cool completely and enjoy over your favorite yogurt [it’s amazing with Greek yogurt] or with milk.

    Happy healthy heart Dad! ♥ (of course, you too Mom!)

    Printable recipe:

    https://docs.google.com/document/d/17S2UANxzakM5a9TZtC8XUKT5XXvF_92CVlu9RB-BkMI/edit?hl=en_US&authkey=CO_QiIIO

    Suzie

  • PANCAKES AND SUNDAY MORNINGS….

    Is there a better combination? I think not.

    Sunday is my favorite day of the week. There are so many good things about Sundays. Sleeping in late,  reading the Sunday paper with a good cup of Joe, Sunday morning jazz, and last but not least…fluffy lemon blueberry pancakes.

    This recipe is adapted from a recent issue put out by Fine Cooking Magazine titled: “Breakfast”. The recipe in the specialty magazine is for buttermilk pancakes and I tweak it to make it my own by adding  few ingredients. Their specialty magazines are popular can be found on news stands and online at www.finecooking.com  Fine Cooking is one of my all time favorite cooking magazines if not my favorite.

    I love the classic combination of lemon and blueberry and this is a great way to celebrate those flavors in a pancake. We are coming into blueberry season, so now is the time to enjoy ripe blueberries and  most importantly, enjoy your Sunday mornings!


    Lemon Blueberry  Pancakes (adapted from Fine Cooking buttermilk pancake recipe) For plain pancakes just omit the lemon zest and blueberries. Note: if you have a large posse you can easily double this recipe  :-) and also the pancakes freeze well for quick morning grab/nuke/eat in the car sans syrup because yes you are the best Mom!

    Yield: about twelve 4-5 inch pancakes

    Ingredients:

    3 T unsalted butter; more for serving

    9 oz (2 cups) all purpose flour

    1/4 cup granulated sugar

    2   1/2 tsp. baking powder

    1/2 tsp. baking soda

    1/2 tsp. kosher salt

    2 cups buttermilk (room temp)   * [TIP: If you don’t have buttermilk; simply take 2 cups of milk and add 2 measured Tablespoons of either lemon juice or white vinegar to the milk and let it sit for 10 minutes and it will thicken slightly and “sour” just like buttermilk].

    1 tsp. vanilla extract (Note: The magazine recipe does not call for vanilla; but I always add vanilla to my pancakes- I think they just taste better)

    2 large eggs

    zest from one large lemon

    1  to 1 1/2 cups fresh blueberries, rinsed well and drained.  (Note: if it’s not blueberry season, by all means use frozen– rinse the berries and let them strain in a mesh strainer to remove as much water as possible.)

    Vegetable oil, for the griddle/skillet

    Pure maple syrup, for serving

    blueberry preserves, for serving

    Directions:

    Heat the oven to 200 degrees. Melt the butter in a small bowl in the microwave and set aside to cool slightly.

    In a large bowl, whisk the flour, sugar, baking powder, baking soda, and salt. In a medium bowl, whisk the buttermilk, eggs, lemon zest and vanilla. Pour the wet ingredients into the dry ingredients. Whisk gently until the dry ingredients are ALMOST incorporated; STOP before the batter is evenly moistened. Add the cooled melted butter and mix until the batter is evenly moistened (THERE WILL BE LUMPS.  Now, walk away. YES I know there are lumps, just back up and resist the overwhelming urge to beat out the lumps…I swear it will be okay. This is going to ensure fluffy pancakes  :-) Let the batter rest for 10 minutes.  Resting the batter also helps any gluten that has formed a chance to relax which also gives a more fluffy and tender pancake.  ;-)

    Heat a griddle or a large skillet over medium heat until a few drops of water briefly dance on the surface before evaporating. Lightly oil the pan/griddle. Working in batches, pour about 1/3 cup of the batter onto the pan/griddle for each pancake, now drop as many blueberries as you like onto the pancake immediately after pouring the pancake, poke them down in slightly with your finger. I like to do one pancake at a time in a skillet, but if you have a large griddle you can do more than one; simply leave about an inch in between pancakes. When you see bubbles rise to the surface and the edges look dry carefully flip them over and cook until the cake is nicely browned about a minute more. TIP: You can find “pancake” spatulas at places like bed bath and beyond; they are round shaped large spatulas. So cool as it makes flipping fun and less stress. Okay a word about pancaking:  There is something weird about making pancakes; I swear the FIRST PANCAKE IS ALWAYS BAD. It’s either too dark, not dark enough etc.  Just chalk it up to pancake karma and  know that you usually have to sacrifice the first pancake to the PANCAKE GODS. I know, you figured this out too, huh?

    *TIP: If your family is not standing over your shoulder grabbing pancakes :-)  I like to hold the pancakes in a warm oven at 200 degrees while I finish the rest. I take a cake pan and line it with a large piece of tinfoil that is big enough to hang over the sides of the cake pan, and after each pancake I take off the skillet, I reach in the oven carefully and plop it in the pan and loosely cover the cakes with the tinfoil while I commence pancaking.

    Serve with hot butter and maple syrup.  Or if you want to try my version; I like to take a dollop of blueberry preserves and fold up the pancake like a taco and eat it this way.

    Printable recipe:

    https://docs.google.com/document/d/108eaSST4wTv9j1BCtc8mtsVI_rj6qMiIDoXgScWbqrM/edit?hl=en_US&authkey=CO_Rr_4M

    Happy pancaking!

    Suzie

  • I ask you, how good are you at banana management?….

    You know,… those bananas you bought at the store last Saturday?…the day before you made your weekly Sunday night resolution to start eating healthy, by perhaps eating a banana every day? Somehow it’s now Friday and you have 6 dark brown bananas. YEAH, YOU KNOW WHO YOU ARE…  :-)

    It’s okay, because now, the week is done, diet be damned.. and more importantly you have that itch. That itch that is calling you….TO BAKE. Trust  me, I get it; mine is like a constant psoriasis.

    And you’re not talkin no ho hum banana bread, no you are dreaming big my friend. You have officially fallen off the diet wagon. OMG; look out! what to bake. You ponder, you cruise the internet perhaps. Stop looking at all that food porn!

    Here it is. Wait for it…wait for it…

    We are talkin’

    Banana cupcakes with dulce de leche filling and cream cheese frosting

    OooHh yeah…bum bup…buka buka cha kow…bum bup..cue the music..OooOh YeahH. (I hope we are both thinking of the same song) ;-)

    Here we go…

    Banana Cake (recipe by yours truly) Yields 24 cupcakes

    Ingredients:

    1 1/2 Cup mashed bananas (probably 4-5 unless they are huge)

    3 C cake flour (I like cake flour because it yields a more tender crumb)but if you don’t have cake flour- don’t stress, you can use all purpose. This is therapy, right?

    1 1/2 tsp. baking soda

    1/4 tsp. kosher salt

    3/4 tsp. Saigon cinnamon (or whatever you have on hand) I’ll try not to go all OCD on you.

    3/4 C room temperature butter

    2 C sugar

    3 eggs (room temp)

    1 1/2 tsp. vanilla bean paste (or 1 1/2 tsp. vanilla will do) sorry for my OCD tendencies..

    1 1/2 C room temp buttermilk

    1 [13.4 oz] can of dulce de leche [Look for Nestle la Lechera]you can find it in the hispanic aisle or in a hispanic grocery for sure doll]

    1 Recipe: for cream cheese frosting below

    Directions:

    Heat the oven to 350 degrees. Prepare 2 standard size muffin/cupcake tins with paper liners. No need to spray.

    Cream the butter and sugar in the bowl of a stand mixer using the paddle attachment until light & fluffy; or if you don’t have a stand mixer you can do it with a hand mixer on medium.

    Add the eggs one at a time and stop after each one; scraping down the sides and bottom of the bowl. Continue to mix at medium speed until incorporated. Don’t beat the hell out of it, just get it together. Add the vanilla paste/or vanilla- combine. Add the mashed bananas, combine for say 15 seconds.

    In a separate bowl whisk with a fork all the dry ingredients.

    Starting with the dry ingredients add about 1/3 of it to the batter and mix on med speed, then add about 1/3 of the buttermilk, mix, and continue in this alternating pattern until you end with the dry ingredients.

    Fill the cupcake liners until almost to the top; should yield about 24.

    Bake in a preheated 350 over for 20-25 mins. until they are light golden brown, and a toothpick comes out almost clean when inserted but has a few moist crumbs. Check them at the 20 min. interval.  Everybody’s oven is different, so watch them closely they have a tendency to get a wee bit dark at the end and if they get too dark, loosely cover the pans with tinfoil tented so it doesn’t touch the cakes.

    Take them out; cool on a wire rack. Once they are cooled completely, now it’s time for some minor surgery. You will only feel slight pressure… :-)Using an apple corer; go down about 1/2 way, and  you are going to remove a

    portion of the cake to create a small hole so you can pipe in the filling. *

    * I use a piping bag  and a large plain tip to pipe in the dulce de leche, but if you don’t have one you can use a large ziplock bag and simply cut off one of the corners to fill in the holes.

    Frost the cupcakes with the cream cheese frosting.

    Cream cheese frosting:

    1 pound cream cheese [cold]

    1/2 stick butter

    5 Cups powdered sugar

    1 tsp. vanilla

    Directions:

    In a stand mixer bowl using the paddle attachment; whip [on high speed] the cream cheese and butter until very pliable. Stopping to scrape down the sides of the bowl. Add a cup of the sugar at a time and beat on med high speed until you have added all of the sugar. Add the vanilla and beat again until combined. Frost the cupcakes and store them in the fridge.

    Happy Baking! Buka Buka ka chow…

    Suzie